Welcome to “DIY Gecko Hides: Creating Safe Spaces for Your Scaly Friend”! In this article, you will discover how to craft cozy and secure hiding spots for your beloved gecko using accessible materials and simple techniques. Providing safe spaces for your pet is essential for their well-being, as it allows them to feel secure and reduces stress. Whether you’re a seasoned reptile enthusiast or a newcomer to the gecko world, these easy-to-follow DIY projects will ensure your scaly friend has the perfect little retreat in their habitat. So, roll up your sleeves and get ready to create some gecko magic!
Have you ever wondered how you could create a more enriching environment for your gecko without splurging on expensive pet store accessories? Crafting DIY gecko hides can be a fun and rewarding way to provide your scaly friend with safe spaces while also tapping into your creative side. Not only do these hides serve as essential shelters, offering security and comfort, but they can also add a unique touch to your gecko’s habitat.
Understanding Your Gecko’s Needs
Before diving into the creative process, it’s important to understand why geckos require hides and what their specific needs are. Geckos, like many other reptiles, have instincts that drive them to seek out cozy, secure shelters. These hides serve as retreat spots to help your pet manage stress, regulate their body temperature, and rest.
Why Hides are Essential
Hides play a critical role in your gecko’s daily life, contributing to their overall well-being. Here are some key reasons why hides are necessary:
- Stress Reduction: Geckos in the wild use natural hides to escape from predators, rest, and feel secure. Providing similar environments helps reduce stress in captivity.
- Thermoregulation: Geckos are ectothermic and rely on external sources to regulate their body temperature. Hides placed in different temperature zones assist in this process.
- Rest and Sleep: Like any creature, geckos need places where they can sleep during the day.
- Shedding Aid: A moist hide can significantly help during the shedding process, making it easier for your gecko to remove old skin.
Understanding these needs will inform the design and placement of your DIY hides.
Materials: Your Crafting Arsenal
The best part about DIY projects is that you can use a variety of materials, many of which can be found around your home. Here are some commonly used materials that you might consider:
| Material | Benefits |
|---|---|
| Cardboard | Inexpensive, easy to work with, readily available |
| Plastic Containers | Durable, easy to clean, various sizes and shapes |
| Clay or Ceramic | Aesthetically pleasing, can retain moisture for humid hides |
| Foam and Grout | Customizable shapes, lightweight, durable |
| Natural Elements | Aesthetic appeal, can mimic natural habitat |
Safety First
Regardless of the material you choose, ensure it is non-toxic and safe for your gecko. Avoid using materials that could splinter, have sharp edges, or contain harmful chemicals. If you’re repurposing items, make sure they are thoroughly cleaned and sanitized.

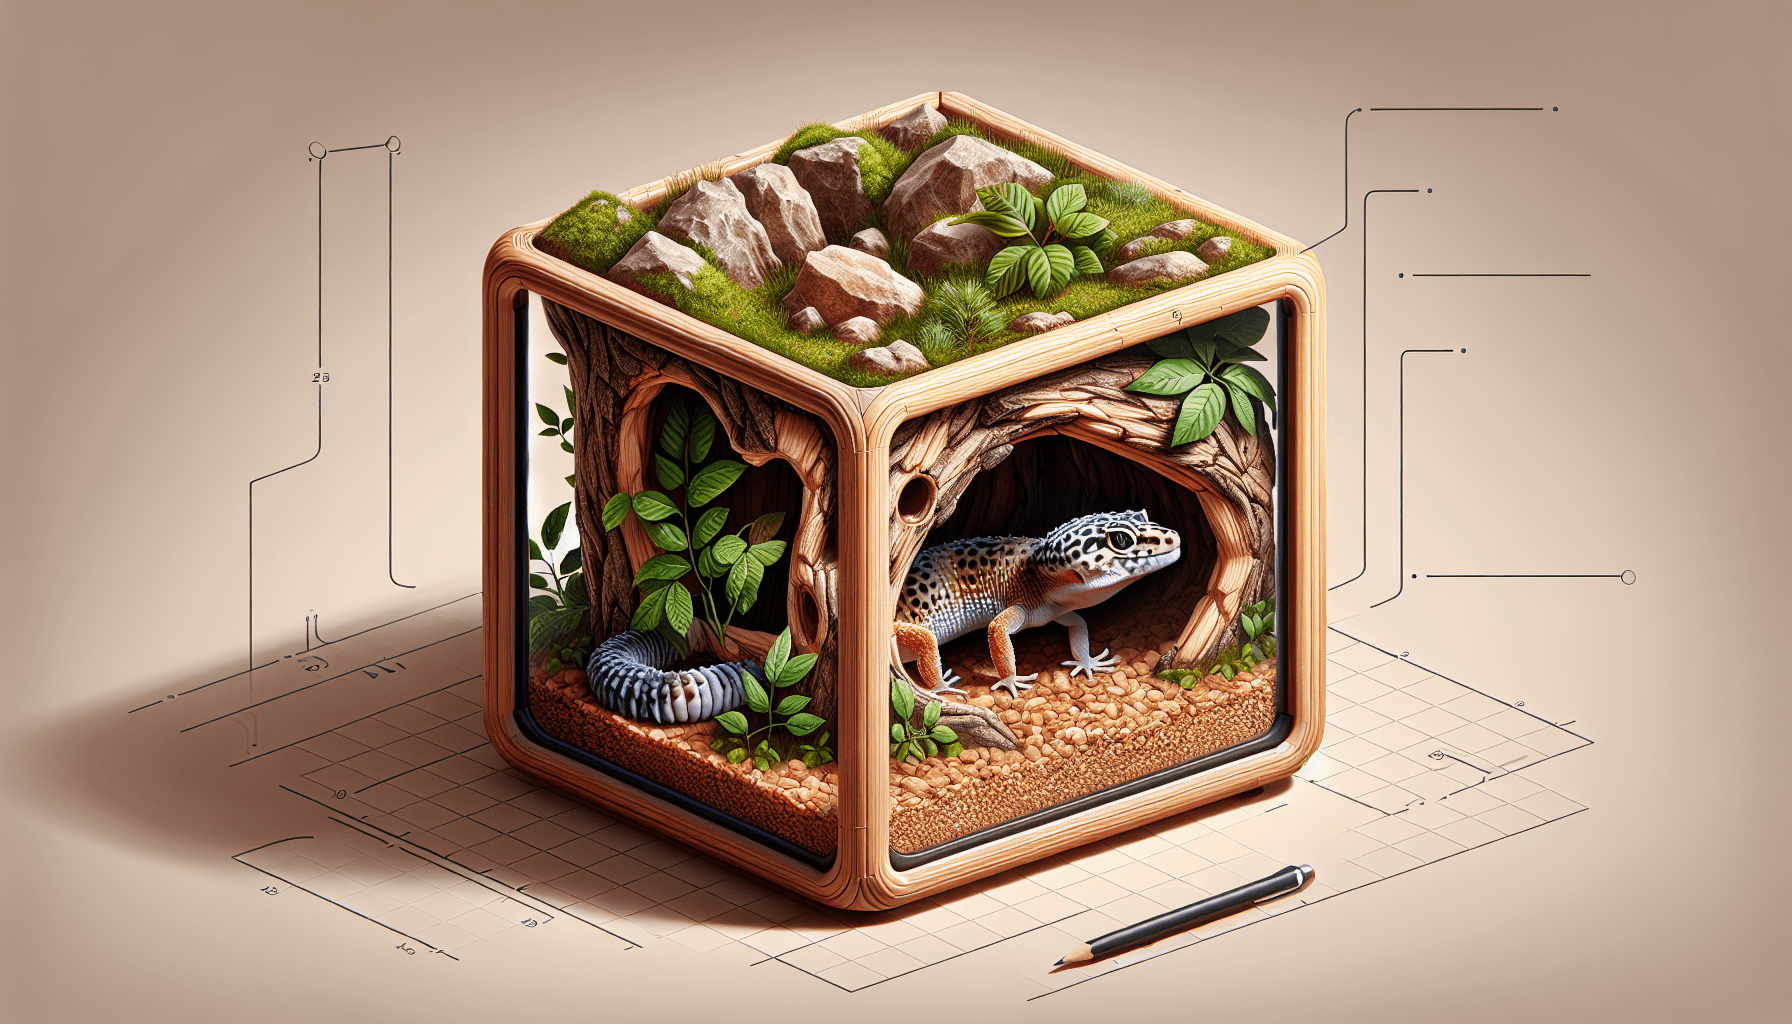
Types of Gecko Hides
There are various types of hides you can create, each serving different purposes in your gecko’s habitat. Ideally, you should have at least three hides: a cool hide, a warm hide, and a moist hide. Let’s explore how to make each type.
Cool Hide
A cool hide is essential for geckos to retreat to when they need to cool down. This hide should be placed in the cooler side of the enclosure, away from heat sources.
Materials Needed
- Cardboard or plastic container
- Scissors or utility knife
- Decorative elements (optional)
- Non-toxic paint or markers (optional)
Steps to Create a Cool Hide
- Choose a Container: Select a box or container that is large enough for your gecko to enter and move around comfortably.
- Cut an Entrance: Use scissors or a utility knife to cut an appropriately sized entrance. Smooth any rough edges.
- Decorate: If desired, paint or decorate the hide to make it visually pleasing. Ensure any paint used is non-toxic and fully dry before placing it in the enclosure.
- Place in Enclosure: Position the hide on the cooler side of the tank.
Warm Hide
A warm hide is essential for thermoregulation and is placed on the warmer side of the enclosure, often above or near an under-tank heater or heat lamp.
Materials Needed
- Clay or ceramic pot
- Sandpaper (if needed)
- Non-toxic sealant (optional)
- Decorative elements (optional)
Steps to Create a Warm Hide
- Select Your Pot: Choose a clay or ceramic pot that’s the right size for your gecko.
- Create an Entrance: Depending on the shape of the pot, you may need to cut or sand down an entrance. Sand any rough edges.
- Seal (Optional): Use a non-toxic sealant to protect the material, particularly if you plan to paint or decorate it.
- Decorate: Decorate the exterior as desired. Again, ensure any materials used are safe.
- Place in Enclosure: Position the hide near the heat source.
Moist Hide
A moist hide helps with shedding and provides a humid retreat. This hide should be placed in an area where it can maintain humidity, typically in the middle of the temperature gradient.
Materials Needed
- Plastic container with a lid
- Moss or moist substrate
- Utility knife or scissors
- Spray bottle (for misting)
Steps to Create a Moist Hide
- Find a Container: Choose a plastic container with a lid that’s large enough for your gecko.
- Create an Entrance: Cut an entrance hole in the side. Smooth any rough edges.
- Fill with Moss: Add moistened moss or another suitable substrate inside the container.
- Spray: Use the spray bottle to keep the inside humid but not wet.
- Close and Place: Secure the lid and place the hide in the enclosure.
Customizing Your Gecko Hides
Making the hides functional is the first step; now let’s make them stylish! Customizing the appearance of your gecko hides not only makes the habitat more enjoyable for you to look at, but it can also create a more enriching environment for your pet.
Painting and Decorating
Feel free to paint and decorate your gecko hides to match the theme of your enclosure. When painting, always use non-toxic, reptile-safe paints. Here are some tips for decorating:
- Natural Look: Use earthy tones and natural textures to create a hide that blends seamlessly into the habitat.
- Bright and Fun: If you prefer a more colorful approach, opt for vibrant hues that match other elements of your setup.
- Theme-Based: You can base the decorations on specific themes such as jungle, desert, or even a fantastical landscape.
Adding Natural Elements
Incorporating natural elements like stones, branches, and live or artificial plants can make the hides more appealing and authentic. Here’s how you can do it:
- Stones and Pebbles: Glue stones or pebbles to the exterior of the hide to create a rocky appearance.
- Branches and Twigs: Attach small branches or twigs to mimic the natural environment.
- Foliage: Use non-toxic plants or artificial greenery to enhance the aesthetic and provide additional climbing options.
Ensuring Functionality
While aesthetics are important, don’t compromise on functionality. Ensure hides remain easy to clean, especially if they are made from materials that could absorb moisture or harbor bacteria. Use sealants and finishes that are reptile-safe and easy to maintain.

Maintaining Your DIY Gecko Hides
Regular cleaning and maintenance will ensure your hides remain safe and durable. Here’s a simple maintenance routine:
Weekly Check
- Inspect for Damage: Regularly check for any damage or wear that could cause harm to your gecko, such as chipped edges or loose decorations.
- Cleanliness: Remove any waste, old food, or substrate from inside the hides.
Monthly Deep Cleaning
- Thorough Cleaning: Remove the hides from the enclosure. Clean them thoroughly with a mild soap and water solution. Rinse well to remove any soap residue.
- Disinfection: Periodically disinfect hides using a reptile-safe disinfectant to eliminate any potential pathogens.
- Drying: Allow the hides to dry completely before placing them back into the enclosure to prevent mildew and mold growth.
Conclusion
Creating DIY gecko hides is a fulfilling endeavor that can greatly enhance the quality of life for your scaly friend. By understanding their needs, carefully selecting materials, and ensuring your designs are both functional and attractive, you can provide wonderful safe spaces that are tailored specifically for your gecko.
Engage in this creative journey and watch as your gecko thrives in their customized, safe, and engaging environment. Not only will you save money, but you’ll also enjoy the satisfaction of crafting something special for your beloved pet.